

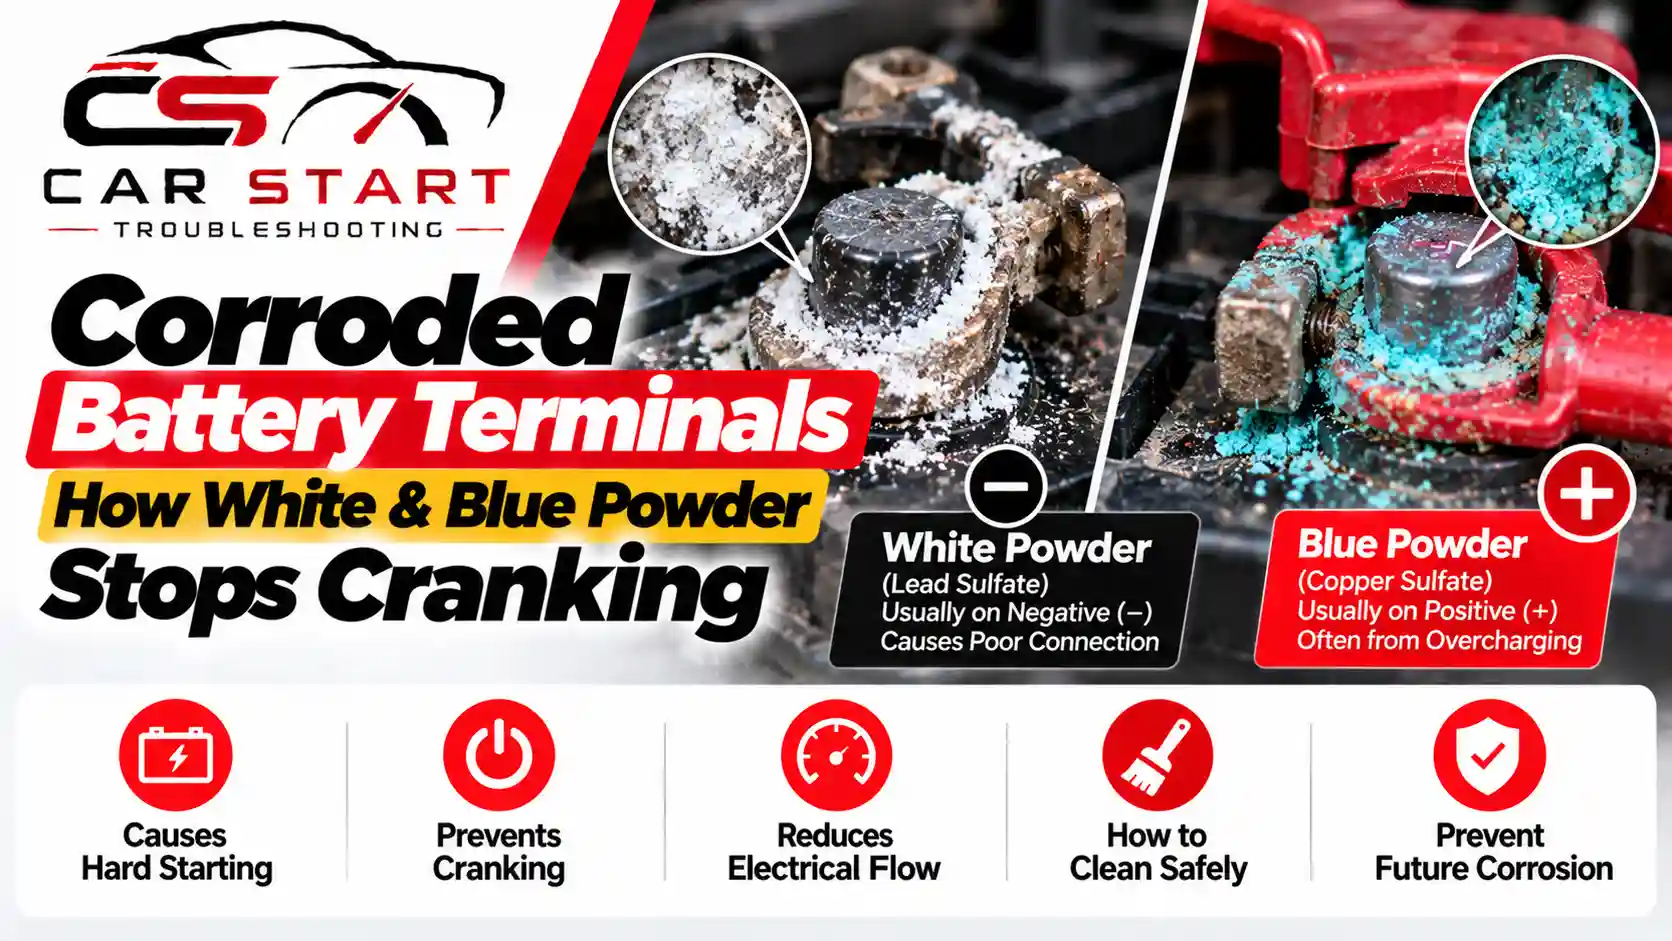
Turn the key, one flat click. Your dashboard lights still glow. Radio plays fine; low-beam headlights shine bright on the garage wall. Starter motor? Dead silent. Check the 12V battery posts right at the clamp ring for corroded battery terminals: how white & blue powder stops cranking. Crusty white lead sulfate (PbSO4) or blue-green copper sulfate (CuSO4) around a post blocks heavy cranking amps in the cold. Why do the dash bulbs still work then? Battery terminal corrosion won’t start; fix it fast through these guides.
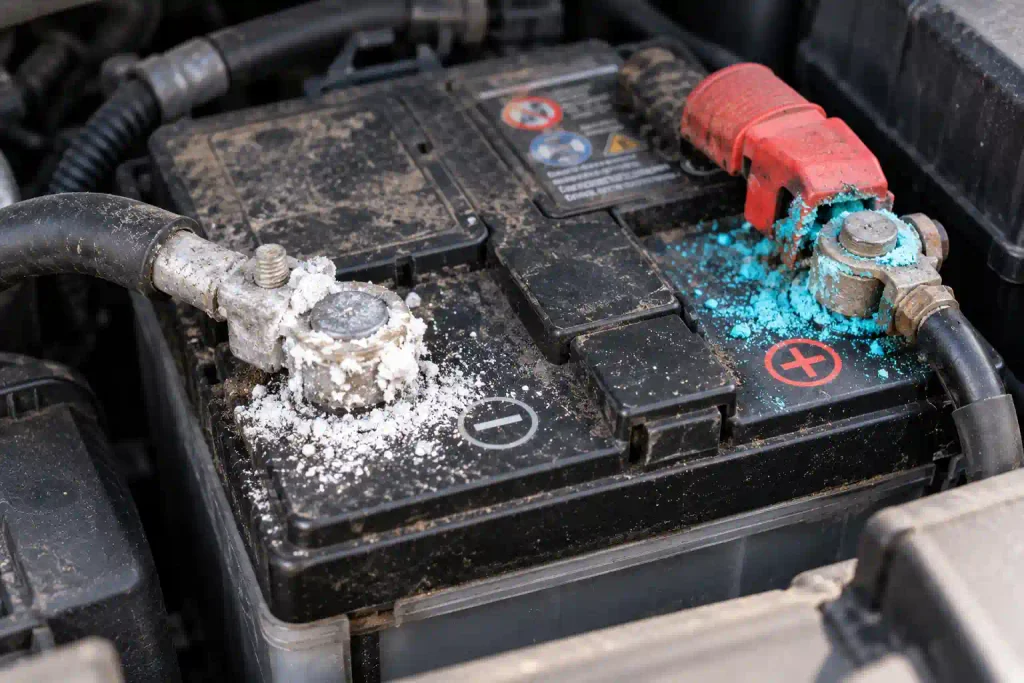
Dash circuits pull maybe 3A to 5A. A cold starter motor pulls 180A to 320A in a split second; just 0.04 ohms of sulfate crust drops starter voltage from 12.6V down to 4.6V. Grab a 10mm wrench, 2 tbsp of baking soda (NaHCO3), and a $6 wire post brush; 15 minutes fixes it for good.
1. What That White & Blue Powder Actually Is (12V Battery Chemistry)
Where does that chalky buildup come from? Not road dust. Every standard 12V lead-acid starter battery holds lead-antimony or lead-calcium grids submerged in electrolyte (roughly 35% sulfuric acid [H2SO4] and 65% distilled water by weight). When the engine runs at 1,500+ RPM, the alternator pushes 13.8V to 14.5V back into those cells. Electrolyte temperature climbs fast. Warm acid vents trace hydrogen gas (H2) and microscopic sulfuric acid vapor.
On a fresh battery with tight factory post seals, side vent ports carry those fumes away. After 2 or 3 harsh winters, engine vibration and under-hood heat cycles (0°F to 195°F) open tiny gaps where the soft lead post passes through the polypropylene top case. Acidic vapor creeps up the post base. Right away, it reacts with the metal cable clamp bolted on top.
Two distinct chemical salts show up under the hood. Chalky white or grey-white powder is lead sulfate (PbSO4), or dry anhydrous copper sulfate before humidity hits it. Sulfuric acid mist eating straight into the lead post or a lead-alloy clamp forms PbSO4. Bright blue, teal, or greenish-blue fluff is hydrated copper sulfate (CuSO4·5H2O). Acid fumes touching bare copper cable strands or a copper-plated clamp turn solid copper wire into blue salt crystals. Left alone for 6 months, CuSO4 eats right through 4-gauge (4 AWG) starter wire.
2. How 0.04 Ohms of Crust Stops a 200A Starter (Starter Motor Voltage Drop)
What trips people up with corroded battery terminals: how white & blue powder stops cranking? The headlights work. The horn honks loud; the radio screen boots right up. Yet turning the ignition key gives you one loud click, or a rapid machine-gun click-click-click. Dead battery? Usually not. Plain Ohm’s law (V_drop = Amps × Ohms) explains the whole thing.
Cabin dome lights, dash gauges, and the fuel pump relay draw tiny current, around 2A to 8A total. Even a heavily crusted clamp still has enough pinpoint metal contact to pass 5A without dropping voltage. Starter motors operate on a totally different scale. Cranking a cold 4-cylinder, V6, or V8 engine off a dead stop pulls 150A to 350A in 0.2 seconds. At 10°F with thick 5W-30 oil in the pan, cold-cranking amp (CCA) draw spikes even higher.
Sulfate salts (PbSO4 and CuSO4) are electrical insulators, not conductors. Sandwiched between the tapered lead post and the inner ring of your cable clamp, a paper-thin film of white crust adds 0.04 to 0.08 ohms of series resistance. Look at the voltage math across a dirty clamp with just 0.04 ohms of extra resistance:
- Key ON, Engine OFF (5A Dash & Radio Load):
5A × 0.04Ω = 0.2V drop. The car’s fuse box still sees 12.4V DC. Everything on the dash looks 100% normal. - Key Turned to START (200A Starter Solenoid & Motor Load):
200A × 0.04Ω = 8.0V dropRight at the battery clamp! A full 12.6V battery suddenly delivers only 4.6V down the starter cable. - Why the Starter Solenoid Clicks & Cuts Out: Your starter solenoid needs at least 9.0V–9.6V to hold the pinion gear against the flywheel ring gear. At 4.6V, the solenoid magnetic coil drops out instantly. Current stops; voltage bounces back to 12.6V; the solenoid snaps shut again, click-click-click.
3. White Negative Crust vs. Blue Positive Crust: What the Colors Mean
Don’t scrub the posts blind. Check which terminal has the buildup first. Whether the crust sits on the negative (−) post or the positive (+) post tells you a lot about your alternator regulator and driving habits.
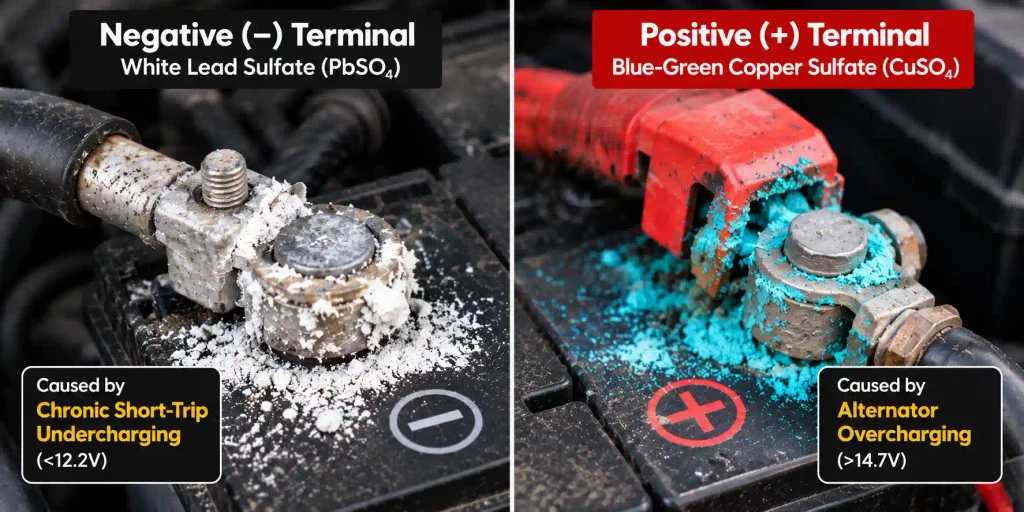
Chalky White Powder on the Black Negative (−) Post
Dry white powder piled on the negative (−) clamp points to chronic undercharging. Do you drive mostly short 5-minute errands under 35 MPH? Cranking the engine pulls a big chunk of amp-hours out of the battery; a 5-minute drive doesn’t give the alternator enough run time to push that charge back in. Slipping serpentine belts, weak alternator diodes, or a 50mA parasitic glove-box drain cause the same issue. Undercharged batteries sit below 12.2V DC, sulfate internally, and vent acidic mist right up the negative post seal.
Bright Blue or Green Powder on the Red Positive (+) Post
Blue or turquoise-green fuzz on the positive (+) clamp, or creeping into the braided copper wire, often points to overcharging or exposed copper strands. Because the positive post carries higher electrical potential, anodic corrosion strikes there fastest when alternator output climbs too high. If a worn voltage regulator pushes 14.8V–15.3V into a warm battery, the electrolyte boils and gasses hard. Acid vapor forces its way past the positive post seal and attacks the copper cable. Spot heavy blue powder on the (+) clamp? Check running voltage with a multimeter right after cleaning.
4. Mechanic’s Diagnostic Table: Powder Color, Voltage & Exact Fix
Match the crust color and location on your 12V battery to its chemical formula, multimeter reading, and shop fix below:
| Powder Color & Spot | Chemical Formula | Root Electrical Cause | Multimeter Reading | Exact Shop Fix |
|---|---|---|---|---|
| Chalky White on Negative (−) Post | Lead Sulfate (PbSO4) | Short-trip undercharging or loose clamp ring | Resting voltage < 12.2V DC (engine off) | Baking soda wash, brush to silver lead, overnight 2A–4A smart charge |
| Bright Blue / Teal on Positive (+) Post | Hydrated Copper Sulfate (CuSO4) | Alternator overcharging or bare copper exposed to acid mist | Running idle voltage > 14.7V DC | Neutralize acid, inspect copper strands, test alternator regulator |
| Green Crust Under Cable Jacket | Copper Oxide & Sulfate Salts | Acid wicked 2–4 inches up inside the 4 AWG insulation | > 0.5V drop from (+) post to starter B+ stud | Trim back rotted wire to bright copper or swap starter cable harness |
| Dark Grey Glaze Inside Clamp Ring | Lead Oxide (PbO) Film | Air gap inside a stretched or under-torqued clamp | Clamp feels hot right after a crank attempt | Ream inner clamp ring with cone brush; torque 10mm nut snug |
| Rusty Flakes on Hold-Down Tray | Iron Oxide (Fe2O3) | Acid vapor + winter road salt eating steel bracket | Battery case shifts by hand when pushed | Soak bracket in baking soda bath, wire-wheel rust, coat with enamel |
5. Workbench Checklist: Tools, Safety Gear & $8 Garage Supplies
You don’t need a lift or $200 shop tools to fix corroded battery terminals: how white & blue powder stops cranking. Most of these items are sitting in your garage or kitchen cabinet right now:
- Wrap-Around Safety Glasses & Nitrile Gloves (Mandatory): White and blue terminal dust contains dried H2SO4 acid, lead sulfate, and copper salts. One bristle flicking a speck into your eye causes an instant chemical burn. Put glasses on first.
- 10mm Box Wrench or 1/4-Inch Ratchet (8mm on GM Side-Post): Fits 95% of Japanese, domestic, and European top-post battery pinch nuts. GM side-post bolts take an 8mm (or 5/16-inch) wrench.
- 2 Tbsp Baking Soda + 8 oz Warm Water ($1): Sodium bicarbonate (NaHCO3) is alkaline (pH ~8.3). Touching sulfuric acid crust triggers an instant neutralization reaction.
NaHCO3 + H2SO4 → Na2SO4 + H2O + CO2). That turns corrosive acid into harmless salt water and carbon dioxide fizz. - Two-Ended Steel Battery Post & Clamp Brush ($6): Unscrews in the middle; one end has circular inner bristles for the outside of the tapered lead post; the other end has a cone brush to scour the inside contact ring of the cable clamp.
- Jaw-Style Terminal Puller ($7, Optional): Lifts seized clamps straight up off the lead post without prying against the plastic battery lid.
- Chemically Treated Felt Washers & Silicone Dielectric Grease ($5): Seals the post base and outer clamp against oxygen and acid mist after tightening.
- Digital Multimeter ($15): Measures resting DC voltage (12.6V), cranking sag (>9.6V), and running alternator charge (13.8V–14.5V).
6. 7-Step Terminal Scrub & Cable Inspection (Battery Terminal Corrosion Cleaning)
Work through these 7 steps in exact order. Fifteen minutes on a Saturday morning restores 100% cranking amperage without shorting wrenches or blowing ECU fuses:
[Recommended Image #3, Action Photo Instruction]: Show a gloved hand brushing baking soda paste onto a fizzing battery terminal, paired with a close-up of a metal post brush scrubbing the tapered lead post down to bright silver.
Recommended Alt Text:Neutralizing car battery terminal corrosion with baking soda paste and scrubbing lead post with a wire brush
- Step 1, Ignition OFF & Disconnect the Black Negative (−) Clamp First: Pull the key out of the ignition. Switch headlights and dome lights off. Find the black negative (−) cable clamp (marked
−orNEG). Loosen the 10mm nut, twist the clamp left-to-right while lifting straight up, and tuck the negative cable 6 inches away from the post. Why negative first? Your car’s steel chassis, fenders, and engine block are wired directly to the negative post. Unbolting negative first disconnects the whole chassis ground; if your wrench slips and hits the fender later, zero sparks fly. - Step 2: Disconnect the Red Positive (+) Clamp. Second: Pop the red plastic safety cover open. Loosen the 10mm pinch nut on the positive (+) clamp and lift it straight off the tapered post. Stuck tight? Don’t pry against the plastic battery cover, and never whack it with a hammer. Hook a $7 jaw puller under the clamp ears, or gently wedge a flathead screwdriver tip into the clamp split slot to spread it 1mm wider, until it slides right up.
- Step 3, Wiggle-Test Both Lead Posts & Inspect the Case: Grab each bare lead post with your gloved fingers and push side to side. Each post should feel solid in the plastic lid. Does a post wobble, twist, or bubble wet liquid acid around the base? Stop right there. A cracked internal post seal can’t be glued shut; the battery needs replacement.
- Step 4, Neutralize Acid With Baking Soda Paste (Wait 2 Minutes): Spoon or brush your warm baking soda mix (2 tbsp NaHCO3 in 8 oz water) directly onto both posts, both detached cable clamps, and the steel hold-down bracket. White foam will bubble up right away as the alkali neutralizes the sulfuric acid. Let it fizz for 2 full minutes so it dissolves the hard crust packed inside the 10mm bolt threads.
- Step 5, Scour Post Sides & Inner Clamp Rings to Bright Silver: Push the hollow end of your battery brush down over each lead post and twist 10–12 times. Scrape away all dull grey lead oxide (PbO) until bare, shiny silver metal shows all the way around. Next, jam the cone brush inside both cable clamp rings and scrub the inner contact faces clean. Clean the outside of the clamp without scrubbing the inside. The starter still won’t crank!
- Step 6: Check 3 Inches Down the Copper Cable for “Green Rot”: Inspect where the thick 4 AWG copper wire enters the clamp barrel. Has blue-green CuSO4 powder crept 2 or 3 inches under the red plastic insulation? Bend the cable firmly with your thumbs 2 inches behind the clamp. If the wire feels stiff, swollen, or crunchy inside the jacket, acid has wicked into the copper strands. Slice back 1 inch of insulation, scrub the copper with baking soda, or bolt on a fresh $9 replacement terminal clamp.
- Step 7, Rinse, Dry & Bolt Back in Reverse Order (Positive First, Negative Last): Wipe off all white baking soda film with a damp shop rag, then dry both posts and clamps 100% with paper towels. Drop a red felt washer over the (+) post and a green felt washer over the (−) post. Slide the red positive (+) clamp on first, seat it flush at the base of the tapered post, and tighten the 10mm nut until the clamp won’t twist by hand. Reattach the black negative (−) clamp last and snug it down. Finally, smear a thin coat of silicone dielectric grease over the outside of both bolted clamps.
7. Four Garage Mistakes That Crack Lead Posts or Fry Alternators
Plenty of weekend DIYers rush a battery cleanup and create a $250 repair bill. Skip these 4 common mistakes when fixing corroded battery terminals: how white & blue powder stops cranking:
Mistake 1: Hammering a Stuck Clamp On or Off the Post
Lead is soft (Mohs hardness 1.5). Inside the battery case, each terminal post welds directly to thin lead plate straps. Pounding a seized clamp with a hammer or wrench cracks the plastic acid seal or snaps the internal lead weld. Even if the engine starts once, a broken post seal weeps acid nonstop.
Mistake 2: Pouring Coca-Cola Over the Battery Box
Everyone’s heard the old roadside myth about pouring a can of cola on crusty terminals. Sure, mild phosphoric acid and carbonation loosen surface powder slightly. One huge problem: regular soda packs 39 grams of sugar per can. Once engine heat bakes that syrup onto your battery top, clamps, and wiring loom, you’re left with a sticky mess that traps dirt and moisture. Plain baking soda ($1) works 10x better with zero syrup.
Mistake 3: Putting Dielectric Grease Inside the Clamp Before Bolting It On
Silicone dielectric grease is an electrical insulator, not a conductor. Smearing thick grease on the bare lead post before sliding the clamp on puts an insulating film right in the 200A current path. Always bolt clean, dry metal directly onto clean, dry metal first; coat only the outside of the assembled clamp afterward to block air and acid mist.
Mistake 4: Over-Torquing the 10mm Nut Until the Clamp Ears Touch
Lead and thin stamped-brass clamps stretch easily. Crank on a 10mm pinch nut with a long 3/8-inch ratchet until the two clamp ears bottom out against each other, and the ring stretches permanently oversize. Once stretched, it can’t grip the tapered post even with the nut bottomed out. Snug the nut just until the clamp refuses to twist by hand (roughly 50–70 in-lbs).
8. Stopping Repeat Corrosion (Alternator Voltage Testing & Post Sealing) + 2027 Repair Cost Table
Cleaned and sealed the posts? Take 60 seconds with a digital multimeter set to 20V DC to verify your charging system isn’t feeding the corrosion:
- Test 1, Resting Battery Voltage (Engine Off): Touch red probe to (+) post, black probe to (−) post. A healthy 100% charge reads 12.6V to 12.7V DC. Reading 12.0V–12.2V? Hook up a smart trickle charger overnight so chronic undercharging doesn’t grow fresh white PbSO4 on the negative post.
- Test 2, Cranking Voltage Sag (Key Turned to START): Watch the meter while a helper cranks the engine. Voltage must stay above 9.6V DC during cranking. Drops below 9.0V on clean posts? The battery’s internal plates are sulfated out.
- Test 3, Alternator Running Output (Engine Idling at 800 RPM): Running voltage across the posts should hold steady between 13.8V and 14.5V DC. Climbs past 14.8V? Your alternator voltage regulator is overcharging and boiling acid fumes out of the positive seal.
2027 DIY vs. Mechanic Shop Cost Comparison Table
Compare real 2027 parts and labor costs for fixing corroded battery terminals at home versus a repair shop:
| Repair Option | Parts & Supplies | Shop Labor | Total Time | Best Scenario for This Fix |
|---|---|---|---|---|
| DIY Terminal Scrub, Neutralize & Seal | $6 – $14 (Brush, NaHCO3, felt pads, grease) | $0 (Driveway) | 15 – 20 mins | Clamps and 4 AWG copper wires are solid underneath the surface crust |
| DIY Bolt-On Terminal Clamp Swap | $12 – $22 (Pair of marine brass or lead clamps) | $0 (Driveway) | 25 – 35 mins | Factory stamped clamp ring is cracked, stretched out, or eaten thin |
| Independent Mechanic Cleanup & Load Test | $15 – $35 (Shop supplies & terminal ends) | $45 – $95 (0.5 hr labor) | 45 – 90 mins | You want a carbon-pile CCA load test and alternator diode ripple test |
| Full Starter Positive Cable Harness Replacement | $45 – $140 (OEM molded 4 AWG cable assembly) | $110 – $240 (1–2 hrs labor) | 1.5 – 3 hours | Green CuSO4 rot has wicked 4+ inches deep inside the main starter cable |
9. Frequently Asked Questions (Mechanic & Car Owner Q&A)
1. Why do my dashboard lights and radio work if corroded terminals stop the starter?
Amperage draw. Dash clusters, dome bulbs, and radios pull under 8A total; that small current slips right through crusty posts. Your starter motor pulls 180A to 320A at once. Across just 0.04 ohms of sulfate resistance, a 200A draw causes an 8.0V drop (200A × 0.04Ω = 8V), leaving only 4.6V at the starter solenoid, way below the 9.6V minimum needed to crank.
2. Can I pour hot tap water on corroded terminals in a parking lot emergency?
Yes, pouring 1 cup of hot water over heavy white or blue powder dissolves enough sulfate salt to restore metal contact and get you home. One catch: water alone doesn’t neutralize sulfuric acid (H2SO4). Once the water evaporates, leftover acid eats the clamp even faster. Do a proper baking soda (NaHCO3) scrub and grease seal as soon as you park at home.
3. Is white and blue battery terminal powder toxic to touch or breathe?
Yes. Terminal crust combines lead sulfate (PbSO4), copper sulfate (CuSO4), and dried sulfuric acid. It burns eyes and skin on contact and is toxic if inhaled as airborne dust. Wear safety glasses and nitrile gloves, stand upwind while wire-brushing, wash your hands with soap afterward; toss dirty paper towels into a sealed trash bag.
4. Does terminal corrosion mean my battery is dead and needs replacement?
Not automatically. If the battery is under 4 years old, the lead posts don’t wiggle in the plastic lid, and resting voltage holds at 12.6V DC after cleaning and charging, that battery still has plenty of service life. Replace the battery if it’s 5+ years old, fails a CCA load test (<9.6V cranking), or grows heavy crust back within 14 days of sealing.
5. What voltage should a multimeter show before and after starting the car?
Engine off (resting charge): 12.6V to 12.7V DC equals 100% charge; 12.2V is ~50% charged; under 12.0V is discharged. Engine idling (alternator charging): 13.8V to 14.5V DC. Below 13.5V while running means weak alternator output; above 14.8V means a bad voltage regulator is boiling the electrolyte.
6. Should dielectric grease go inside the clamp ring or only on the outside?
Outside only. Dielectric silicone grease is a non-conductive insulator. Keep the bare lead post sides and the inner ring of the clamp 100% clean and dry when you torque the 10mm nut so you get tight metal-on-metal contact. Smear grease over the exterior after tightening to lock out air and acid vapor.
7. Can driving with corroded battery terminals damage my alternator?
Yes. High series resistance at a crusted clamp forces the alternator to run hot trying to push current past the restriction; that extra heat cooks internal rectifier diodes. Worse yet, if a loose, corroded clamp momentarily loses contact while the engine is running, it triggers an inductive voltage spike (“load dump” over 40V) that can fry ECU modules.
8. How often should I inspect and clean my car battery posts?
Pop the hood for a 10-second check at every oil change (every 5,000 to 7,500 miles), plus once right before the first 32°F freeze of winter and the first 90°F week of summer.

Leave a Reply